| YouTube Videos |
| FILTERS: |
| ALL |
| USB Flash Drives |
| Android |
| Android-x86 |
| Backup Cloning |
| Chromecast |
| Dual Boot MultiBoot |
| Linux |
| Messaging IM SMS |
| Misc. Soc Media |
| Music Jazz MPB |
| Remote Controls |
| Screen Recording |
| Smart-TV IPTV |
| Windows |
 |
Krister's Blog krister at hallergard dot com | Last Updated: 2014-10-13 |
|
Here I prepare a USB2-stick to enable dualbooting of Linux and Android partitions, with the help of the
Ranish Partition Manager.
These partitions are proper installations, not just ISO-files! In this way it is possible to multi-boot from a
USB-stick with up to four primary partitions. However, I have not (yet) managed to boot a DOS or Windows partition using
Ranish on a USB-stick - even though this is easily accomplished on a normal hard disk drive.
 View Video 4½ min View Video 4½ min
|
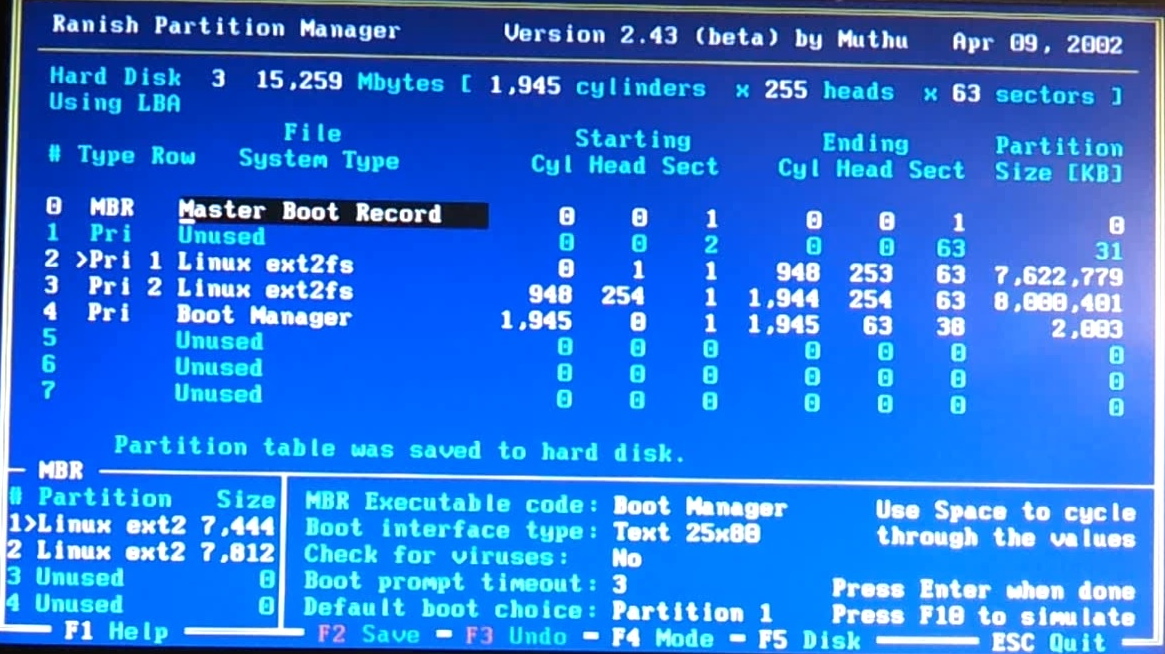 Ranish Partition Manager 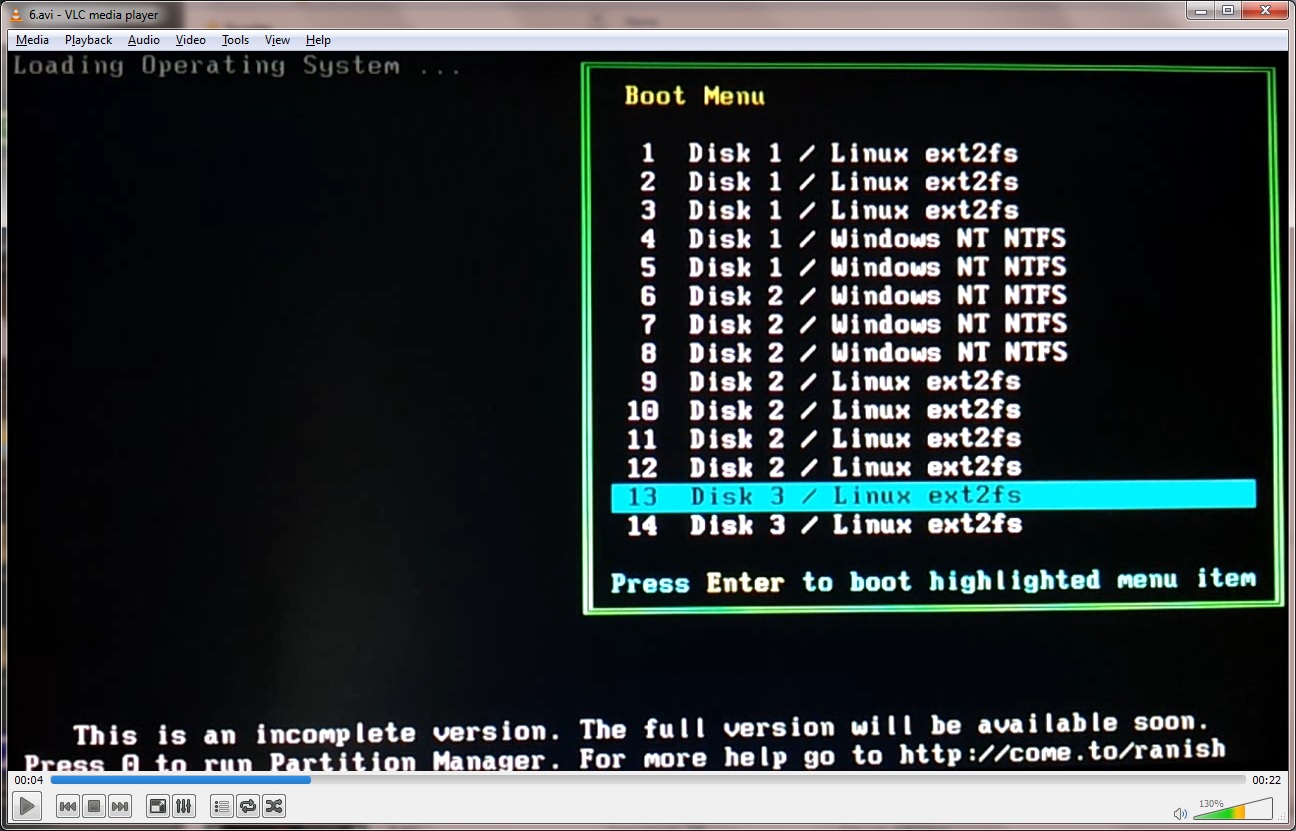 Ranish Boot Menu |
|
I formatted the partitions with file system ext3, which might not be necessary. The partitions are now ready for installation,
just like any partition on any hard disk drive. Here I choose instead to restore two other USB disk images created with Partimage.
To do this I booted Linux Kubuntu on my Desktop (third partition of the first disk). | |
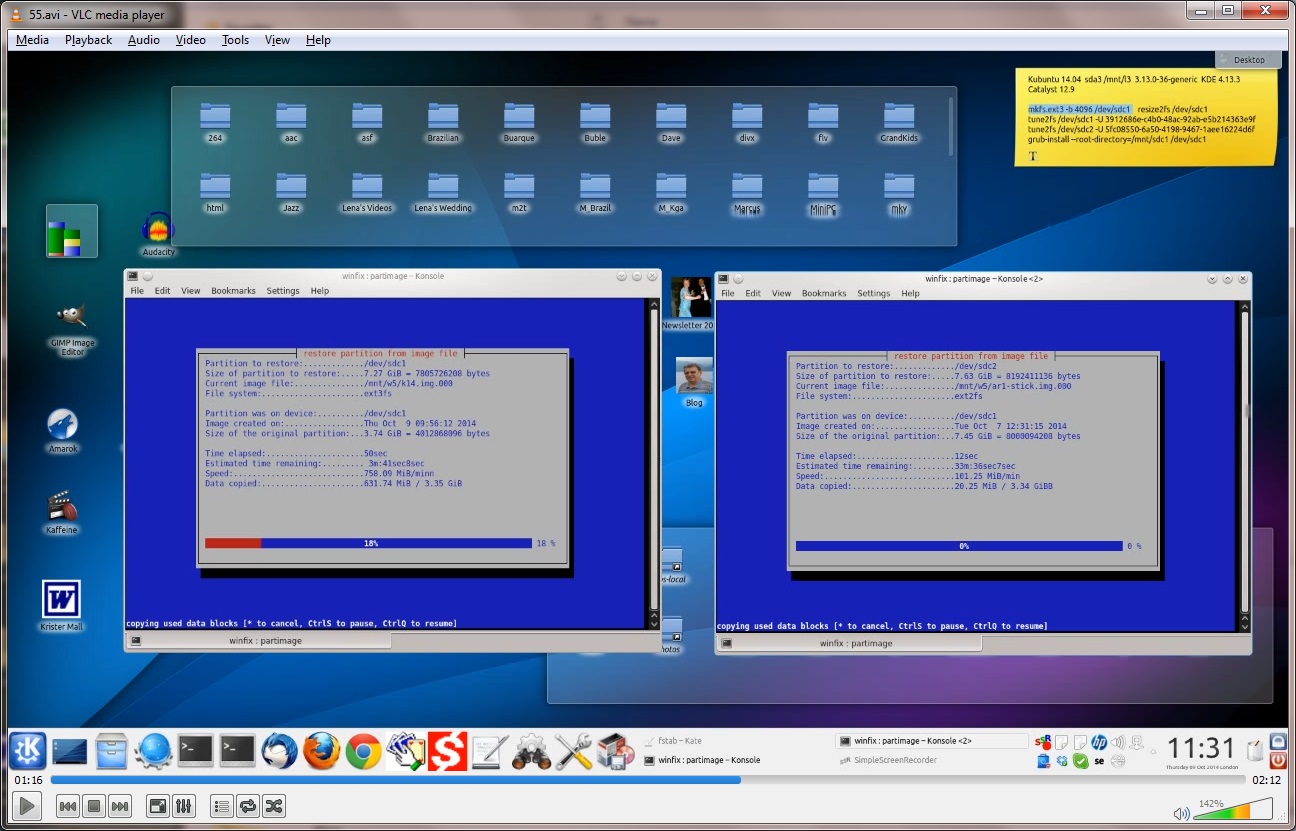 Restoring to /dev/sdc1 Restoring to /dev/sdc2 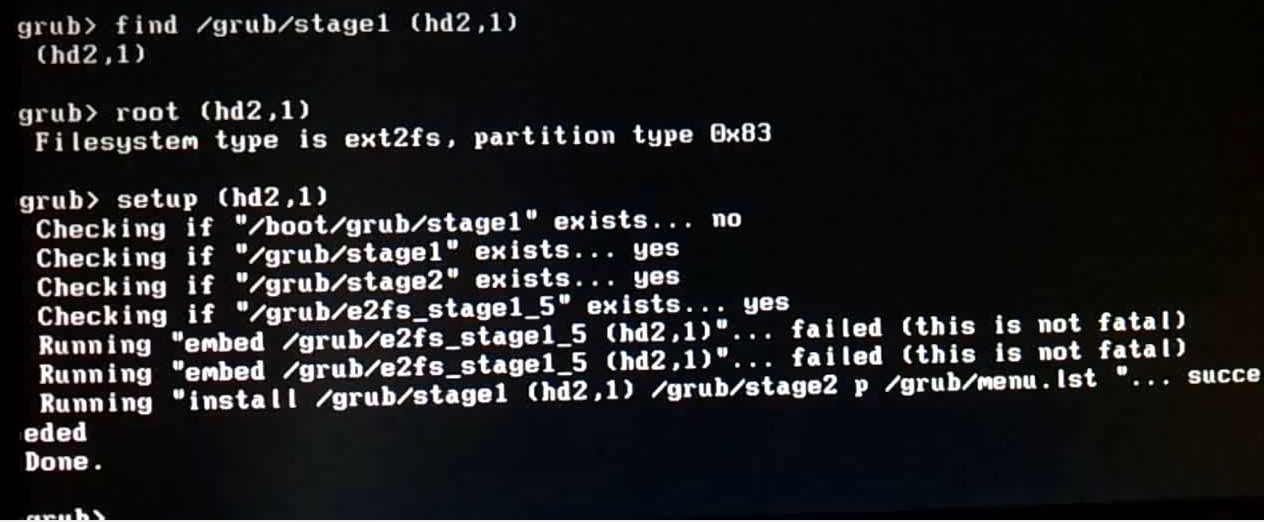 Make /dev/sdc2 bootable |
Partition 1: On the first partition of the USB-stick I cloned a 4GB USB-stick containing a Kubuntu 14.04 (32-bit) installation. I found that 4GB was very much too cramped (yes, am aware that there are Linux distros happy with very much less space), but here I am moving it onto an almost 8GB partition. Later it needs to be resized from 4GB to the available almost 8GB (and in this case the formatting might have been beneficial for the last 4GB, which still would have had the FAT32 format). This Linux partition already has the bootloader Grub2 installed, but to make it bootable, the Grub2 bootsector has to be installed, using this command in a Linux terminal: sudo grub-install --root-directory=/mnt/sdc1 /dev/sdc1 After booting the USB-stick on a new host, it might be advisable too "update-grub". On the next reboot of the USB-stick, any host partition could be booted from the stick's Grub2 boot menu. Partition 2: This Android-x86 partition already has the bootloader Grub1 installed, but to make it bootable the Grub bootsector has to be installed. This is done by rebooting and entering a Grub1 menu - which my PC has on drive 1 partition 1 - the Linux Suse boot menu. When at the Grub1 menu tap "Esc" and "Enter" for OK to exit the graphical interface and tap "C" to exit to a command line with the grub> prompt. The commands are shown to the left: (remember that Grub1 starts counting disks and partitions from 0 - not 1 as Grub2) |